InTANK Series
iR8822(2 CD-ROM bay M.2 SATA SSD RAID Module)
InTANK Series
iR8822(2 CD-ROM bay M.2 SATA SSD RAID Module)
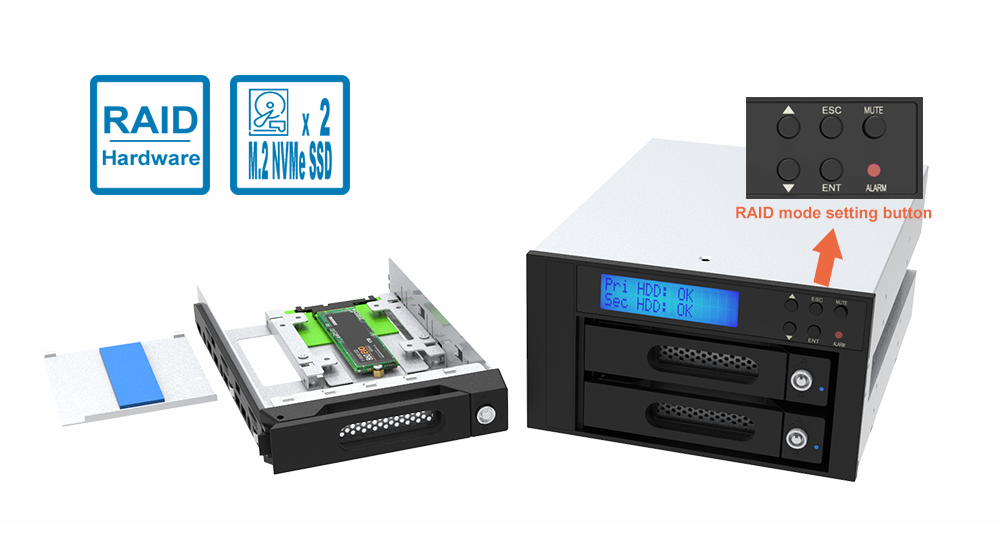
Supports 2 x M.2 SATA SSD RAID 0/1, tray with key lock
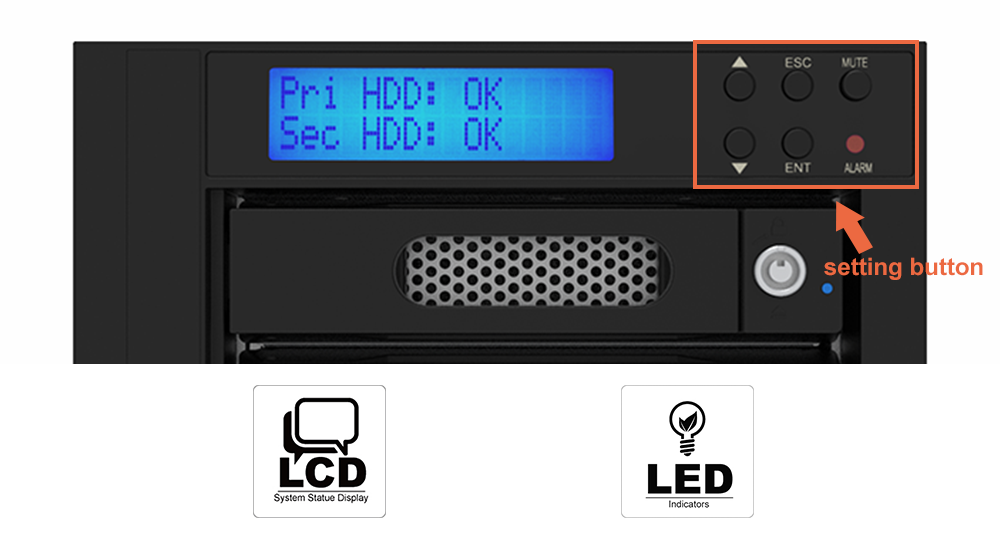
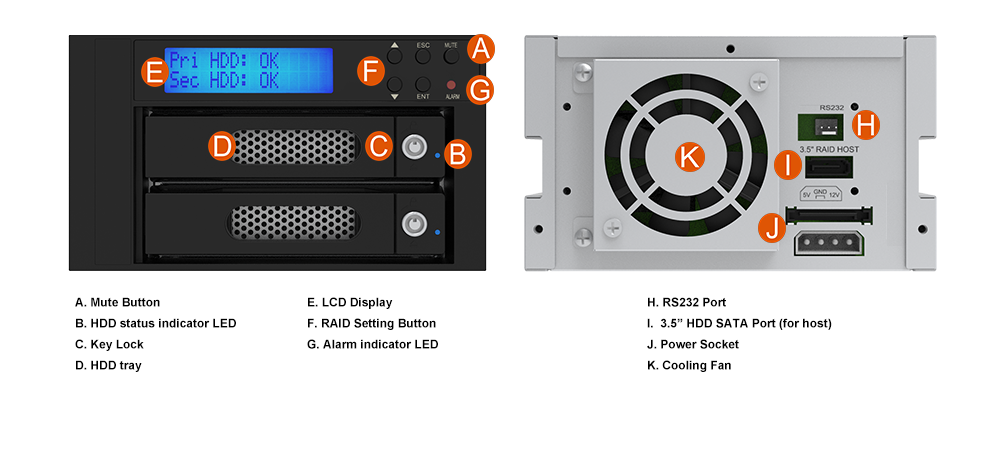
Panel RAID Mode Button Setting, LCD display and LED indicators for system monitoring during operation
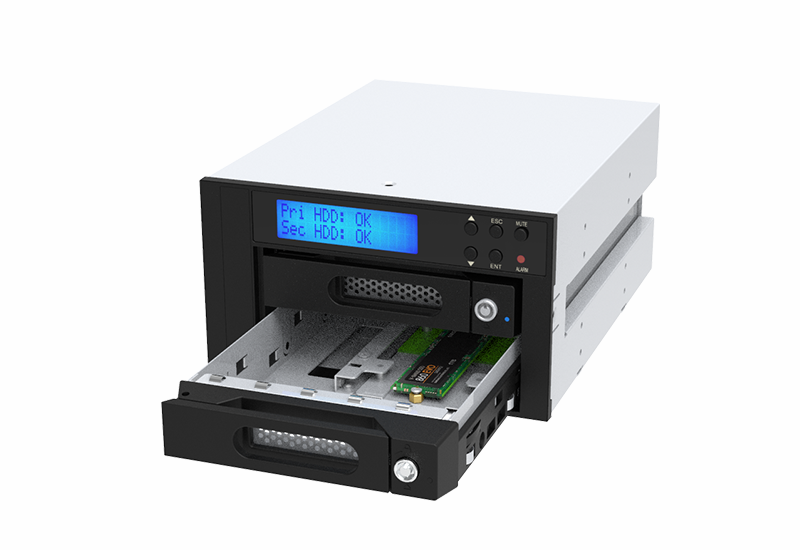
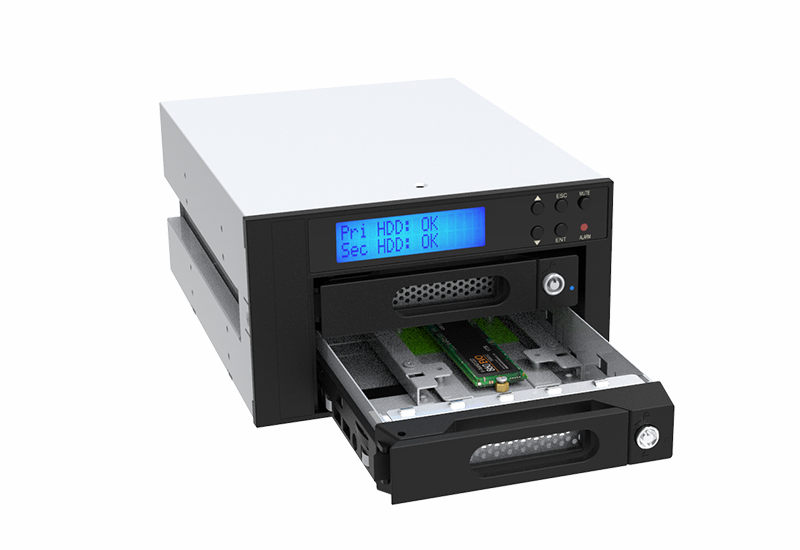
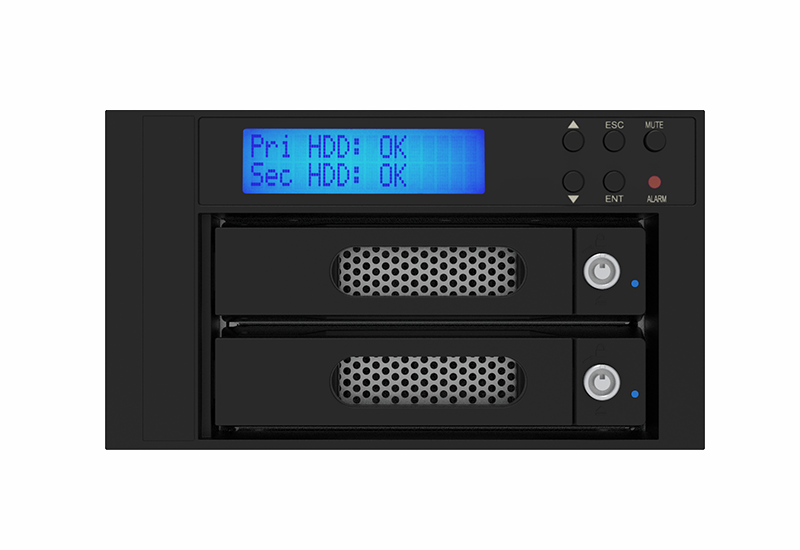
iR8822 provides RAID mode button setting, it built-in LCD & LED display functions
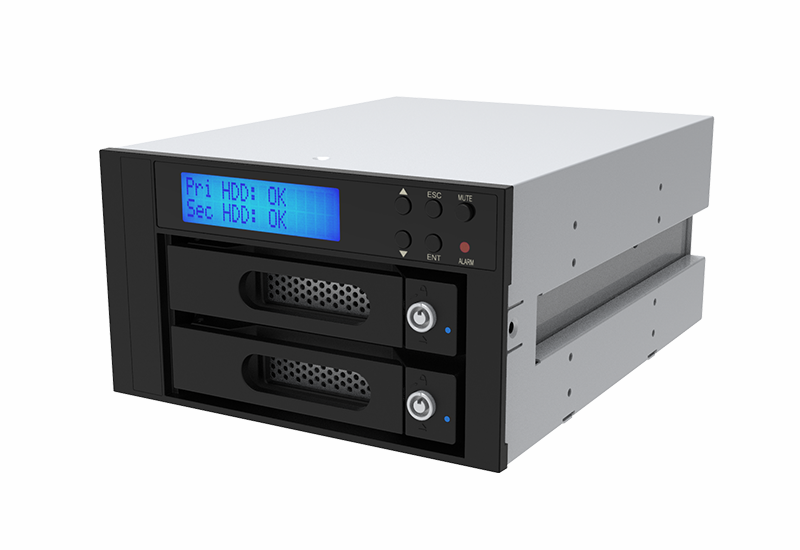
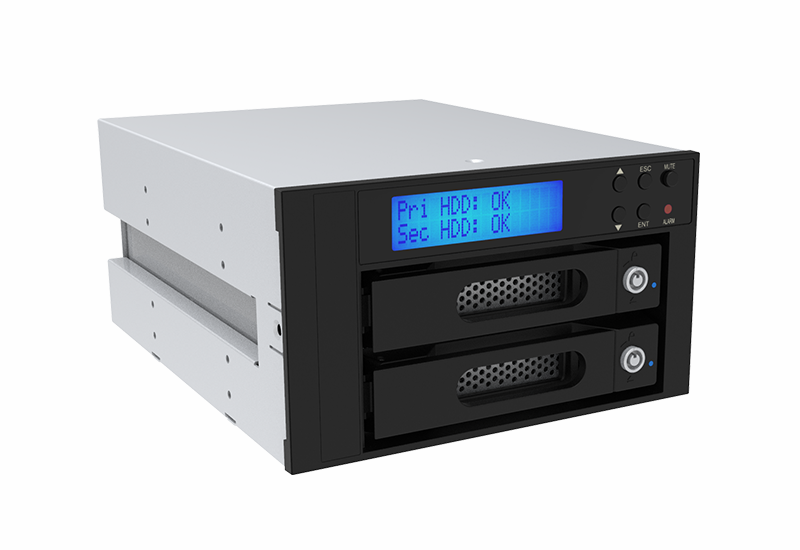
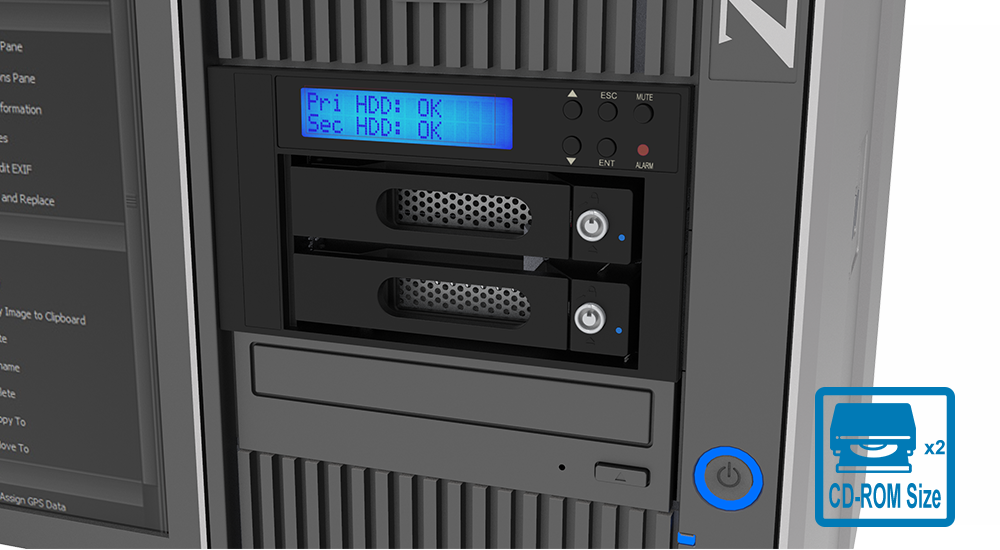
The iR8822 supports the fault tolerant mode of hot-swappable hard disks under RAID 1 status. iR8822 provides RAID mode button setting, it built-in LCD & LED display functions that can monitor and display the hard disk status. The iR8822 supports 2 x 5.25” optical disc drive size, this internal storage module can perfectly match servers, industrial computers, and workstations.
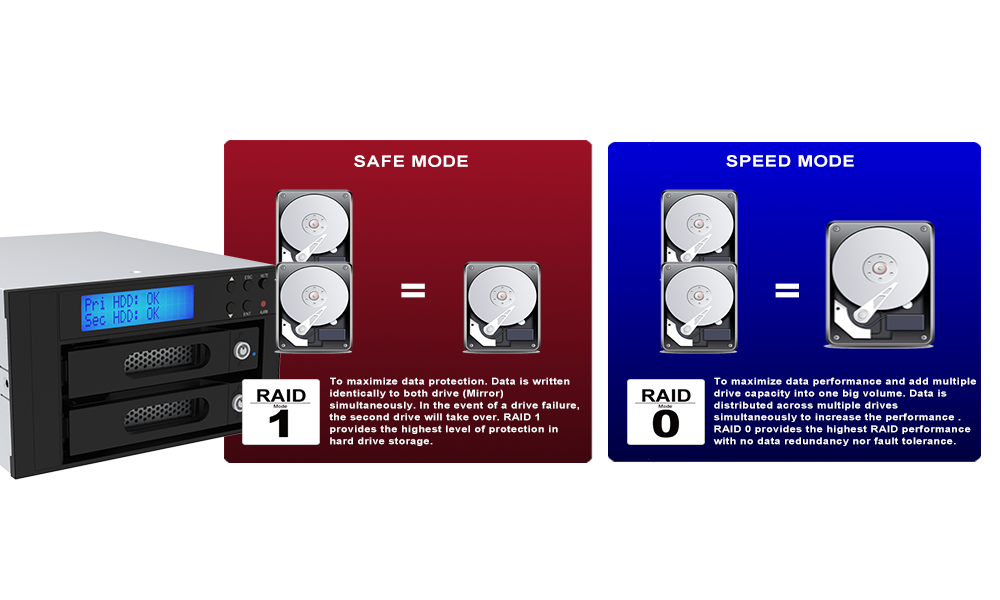
Choose the better RAID mode and disk for the application
RAID 1 mode, the data is mirroring between two disks. For fields which require high data security, it is the most appropriate storage mode.
RAID 0 mode, the data transfer performance will faster and the capacity will be twice than one disk. It can accelerate the access speed of data, but it is not secure.
M.2 SATA SSD provides faster transmission, anti-vibration, and is power-saving. For specific computer platforms, it is a very good choice.
High Reliability or High Performance
iR8822 has two RAID modes - RAID 1 and RAID 0
Provides the monitoring Utility to check the status easily
Not only comes with the LCD monitor, iR8822 also provides one Utility for Windows users. With the Utility, user can know the RAID status of iR8822 such like the RAID mode be used, disk model number and the capacity. Evenbetter, if the disk is be removed or failure, it can send the notification email to user automatically. It allows users to do some respon for the dailure as soon as possible to remedy the situation.
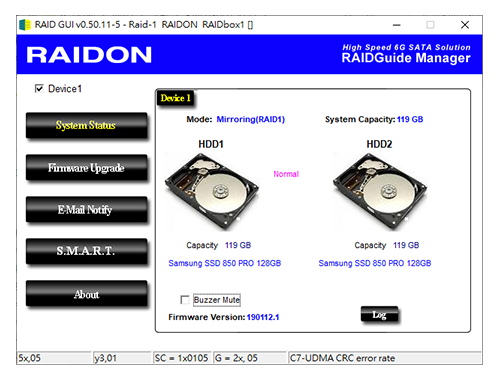
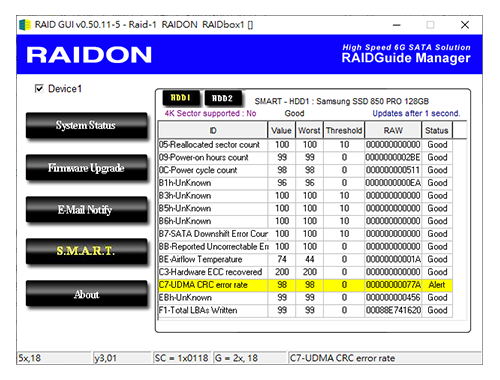
Read the disk S.M.A.R.T. information from Utility directly
The Utility we provided now can read the disk S.M.A.R.T. information. Just open the Utility (RAID GUI) and click the "S.M.A.R.T." button, then you can check the disk status. It allows user to replace the disk before it is failure.
Provides RAID mode button setting, LCD & LED user-friendly display
RAIDON iR8822 provides RAID mode button setting, and is equipped with clear readable LCD display and LED indicators for system monitoring during operation so users can easily grasp the status of the system at all times. Moreover, it comes with visual and audio alarms whenever failure occurs.
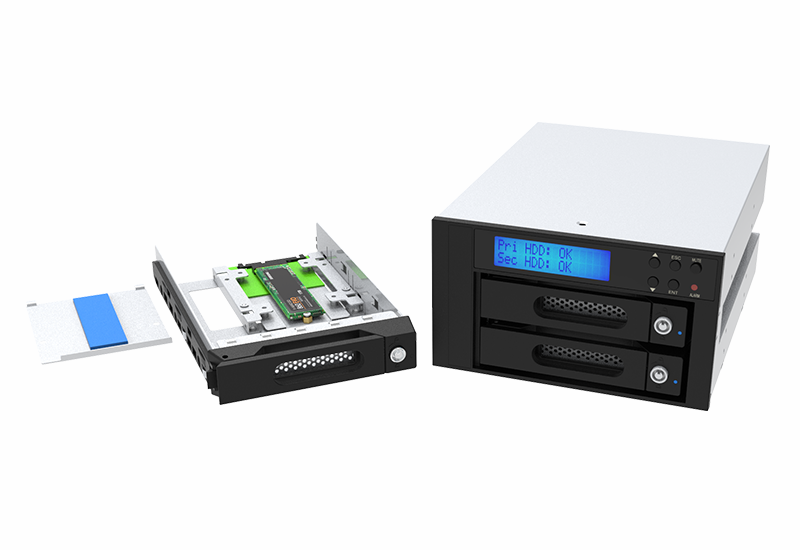
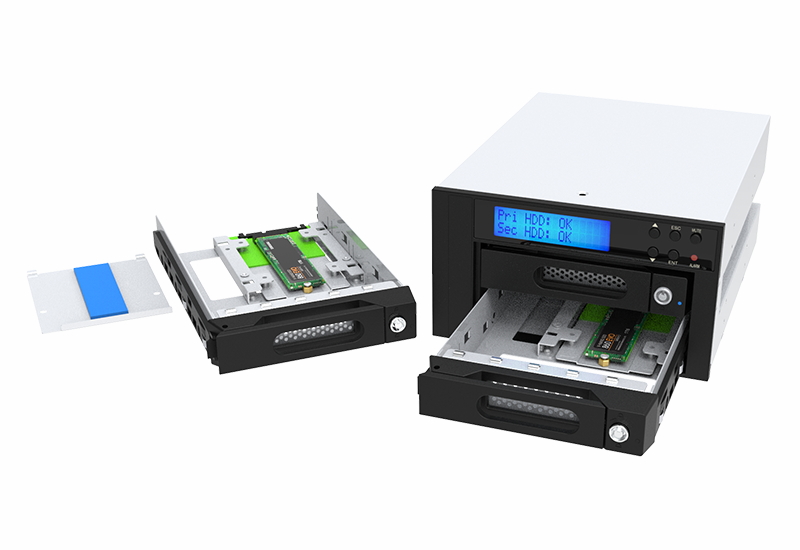
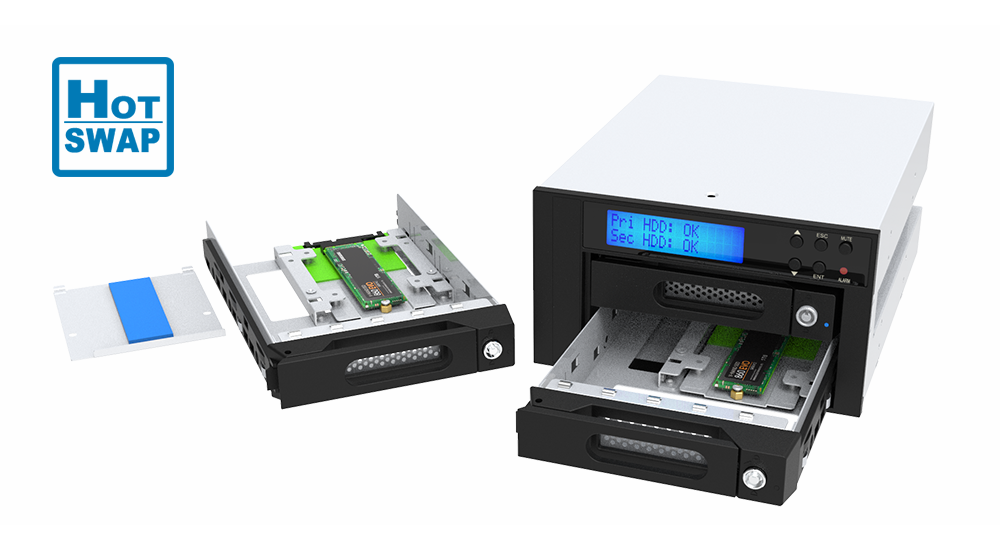
Easy-to-use disk Tray module
RAIDON's easy-to-use disk tray module comes with a key lock and secure the disk with screws. User can buy several disk tray modules and secured the disks first, once there is one disk in iR8822 is failure, just replace the disk directly. It can greatly reduce the wait time for system maintenance.
M.2 SATA SSD Tray provides a key lock, which will not be easily extracted, increasing data security.
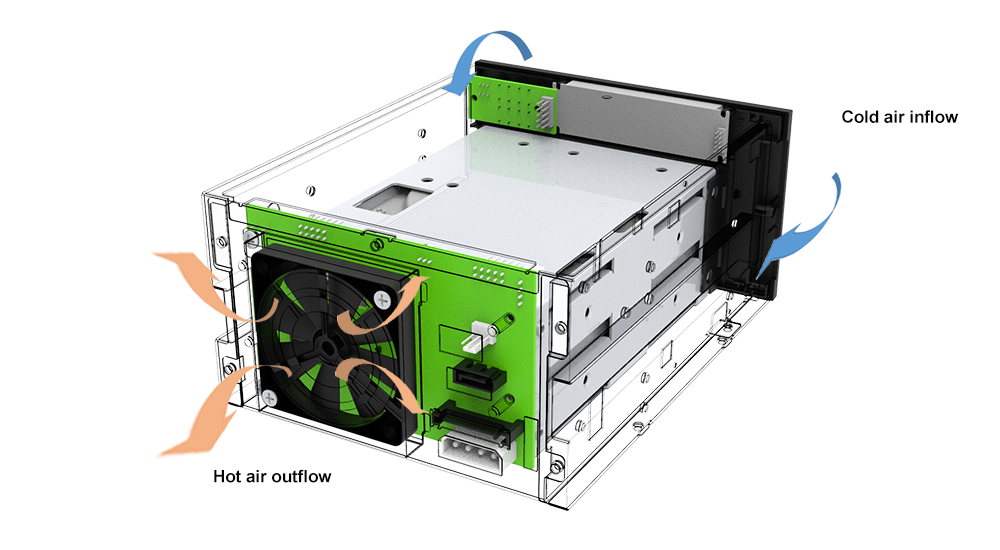
Good heat dissipation can extend the life of the disk
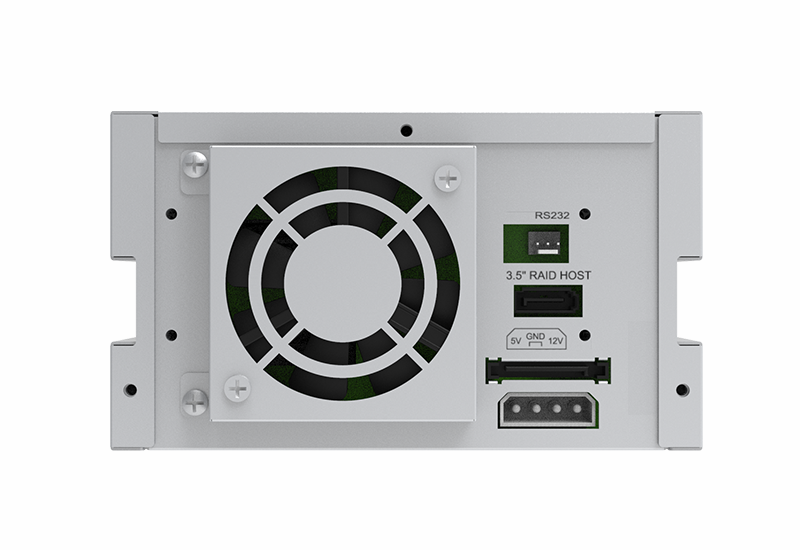
The iR8822 is equipped with a 6-cm silent fan, by constantly creating air flow, heat generated by the high-speed rotation of the hard disk can be easily taken away. This maintains the normal operating temperature of the hard disk at all times. A longer life of your hard disk will properly protect your data.
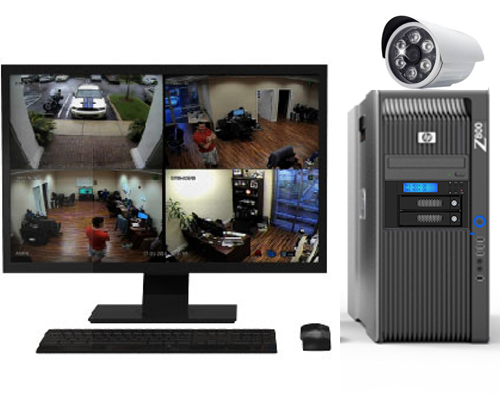
Let The DVR, NVR Device To Install and Use The iR8822 Easily
Take advantage of the durable M.2 SATA SSD to install your DVR, NVR operating system and use two M.2 SATA SSDs with RAID 1 to protect the long-term data. You can even use the iR8822’s hot swapping feature to extract the M.2 SATA SSD periodically and to save it in the data center, then to put in a new hard disk so the iR8822 can continuously perform instant backup.
Product View
Specification
| Model No | iR8822 |
|---|---|
| Interfaces | 1 x SATA III (6 Gbps) |
| Compatible Drive | 2 x M.2 SATA SSD (2242/2260/2280) |
| Storage Mode | RAID 1 or RAID 0 |
| Operating System | Windows, Linux |
| Function Control Interface |
GUI (Windows Only) |
| Electrical and Operating Requirements |
* Line voltage: 12V + 5V DC * Operating temperature: 32° to 104° F (0° to 40° C) * Storage temperature: -4° to 116° F (-20° to 47° C) * Relative humidity: 5% to 95% noncondensing |
| Size and Weight | 148 mm (W) x 84 mm (H) x 202 mm (D) |
| Product Code | EAN: UPC: |
| Carton | 8 pcs per carton |
| Package Accessories | * iR8822 x 1 * SATA Cable * Accessory kit * Quick Installation Guide |
| GUI Software for Windows |
1. Ensure the legacy device is functioning properly before powering down the system.
2. With the system off, replace the legacy device with the iR8822.
3. Remove a hard drive from the legacy device and install it into the iR8822.
4. Turn on the system, ensuring only one hard drive is installed in the iR8822 initially.
5. Upon booting, verify that all information is accurate and correct.
6. Once you've verified the accuracy of the data, proceed to insert another hard drive (either from the previous model or a new one) into the iR8822 while the computer remains powered on. The iR8822 will detect the newly added hard drive and automatically initiate data rebuilding.
7. Completion of the data rebuild signifies the successful update of the system.
* NOTE 1: If the legacy device is currently rebuilding data, please wait for this process to finish before undertaking the steps mentioned above.
* NOTE 2: In cases where the legacy device has only one functioning hard drive, ensure you back up its data prior to starting these operations to prevent potential data loss from hard drive failure during the process.
* NOTE 3: If the old model contains two hard drives, it's advisable to retain one of them as a precautionary measure to prevent damage during the process, which could lead to irreversible data loss.
1. Begin by backing up the data from the functioning legacy device using a third-party application (e.g., Ghost).
2. Turn off the system, then replace the legacy device with the iR8822.
3. Install the two new hard drives into the iR8822 and power on the system.
4. Once the system has booted, proceed to restore the backed-up data onto the iR8822.
*NOTE: If the legacy device is undergoing a data rebuild, wait for this process to complete before starting these procedures.
The issue may arise from existing records or data on the hard drive, preventing RAIDbox from recognizing it. To address this, connect the hard drive to your computer individually, clear its sectors using the operating system, and proceed to reformat it. For step-by-step instructions, please consult the operating system's guidelines. Once completed, you can then reintegrate the formatted hard drive into the RAIDbox for utilization.
RAIDONtek.com uses cookies to improve site functionality and your overall experience by storing necessary information for service delivery. By continuing, you consent to our use of cookies as detailed in our Privacy Policy, which provides more information about this usage.